Category Archives: Design Team Work

12 hour working days… I guess the Christmas break is well and truly over.

… but someone mentioned the other night that there is a public holiday coming up. Wait, what? Already? Haven’t we just had a public holiday and a whole bunch of time off?

Certainly not complaining, I’ll take it.

Our break between term 4 and term 1 is so long, and I do love it, I truly do, but I really love it when term starts again, when the shop is bustling with people taking classes and back into the swing of crafting again. It means working an extra couple of  12 hours days a week for me, like today, but if you enjoy it then it’s not really like work, right?

This week’s page beautifully designed by Sharon was a fun and joyous Christmas layout using an interesting mix of colours and everyone enjoyed it very much. What looked so simple and easy, actually had loads of extra little things in it, that take just that make it just that little extra special. Our morning ladies did take a lot longer to complete, but then, they also had a whole lot of serious chatting catch-up to do since the last class. Tuesday night’s class was done and dusted in 2 hours even with  4 new scrappers in class, (mind you they were all so good at what they were doing, I don’t think they really count as ‘entry level’ students)

Scrapbook House Class kit Christmas Dec 25

Sharon had die cut the trees using her Silhouette machine, (saving everyone buckets of time) then we had everyone using the included template to cut the patterned papers to fit. The finished product, wrapped in blue twine, and tags and ornaments added, looks so good!

The second page Sharon created is also lovely, using the Pink Bazzill provided in the kit, and then a third and fourth pocket page using some of the leftovers. Sharon has also included the pocket page in the kit – bonus!
You can see these lovely pages and close ups too on the store page soon.

Scrapbook House Class Kit Christmas Dec 25

With a plethora of product to use and choose from, there will be enough in this kit to do a  whole album of Christmas! Just look what there was, from gemstones and die-cuts to cut-outs and tags plus a whole 12″x 12″ pad of patterned paper.

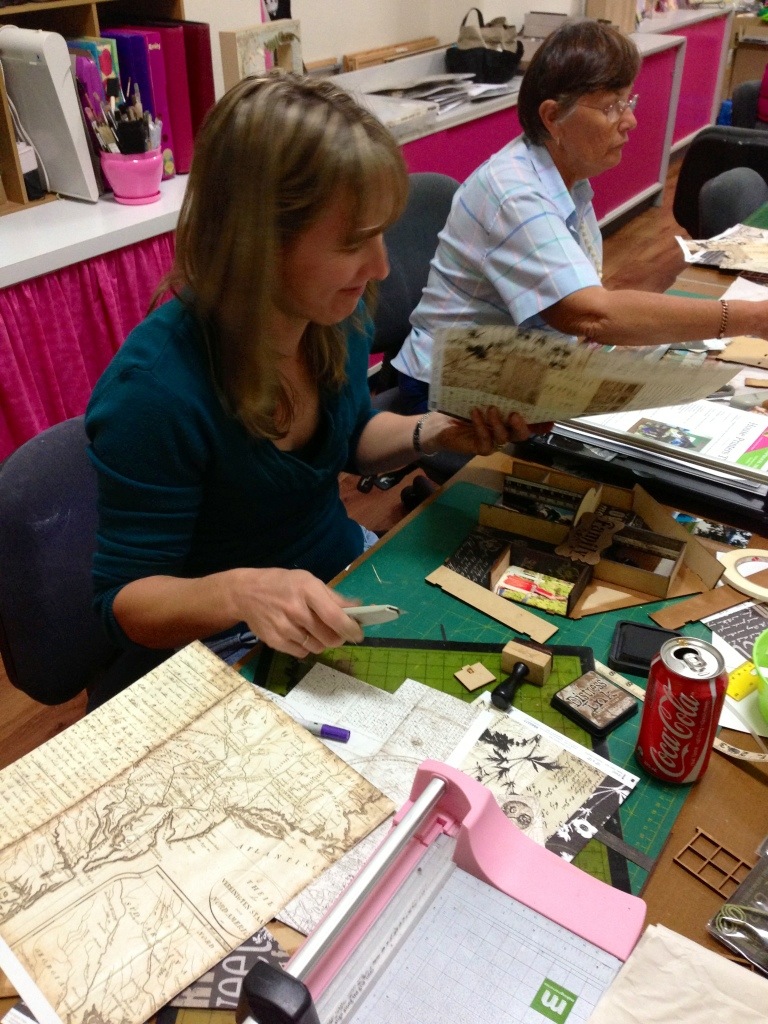
Thanks to our lovely students for a great week back to class

The kit will be available online to purchase soon, check here to buy.

Have a great day

Tania


Her Style was Sassy

with just a bit of attitude…  I asked the kids in class if any of them had a bit of attitude, they were coy and sweetly admitted to “just a little bit”. Darlings.


This is the Art Journal page we did, and we all loved using Distress Crayons. Here’s a quick overview if you would like to re-create this at home.
We primed the page with gesso first, and force dried to be sure there were no damp patches ( we will be adding embossing powder and you don’t want it to stick to your whole page)

Stamp the clock with clear embossing ink, add white powder and heat set.

Crayon on some colour and spray with water, blend with your fingers until the crayon is just “colour” and you can’t see your crayon strokes anymore. Add more water, or blot it off as you like. You can add and remove as much as you want. Really easy! Try different colours.


Allow to dry naturally, then swipe off the white embossing to reveal the clock.

Stamp some words, and flick with black paint.

I added the crayon to the texture paste to have a matching texture colour, then used this mixture on the wildflower stencil to add another layer to our page.

Add clock hands (cut with the diecut machine, yes, the kids cut their own) and finish off with a gem.

Enjoy!

These are products I used – all available at The Scrapbook House

 Here’s another version – different colours.

New Layout Kit – Handmade Quality

Here’s a layout I created with a picture of my Dad at home in his shed. I just loved the set of stamps (they are included in the kit) and our trusty brick die cut got another workout.

I have a limited kits available. Click the picture for more information on how to purchase, or message us.

Workshop 198 Handmade Quality

I thought it was time for a masculine page, this one suits the handyman or the tradie. With embellishments like tools, bricks, gears and wood elements there are a variety of subjects to use. It would also suit a home building or renovations style theme.

Tania


Prima Tales of You and Me

The most beautiful stories are always the tales about you and me. Prima’s new “Tales of You & Me” collection is all about the wonderful stories of all the special people in your life. Floral patterns, vintage designs, and a sweet colour palette make this collection a must have! Once you see the fantastic embellishments you’ll find this line perfect for all those shabby-chic, romantic, and sweet projects you have lined up.Prima Tales of You and Me

We are using this range in our first class for Term 2 with a beautiful page designed by Celeste. It has a beautiful chipboard frame from Dusty Attic which we will be heat embossing with white powder and features a stunning pleated paper design.

Grab these beautiful products as soon as you can – they won’t last long!

Scrapbooking Time

This Saturday night the shop and workroom will be open for late night scrapbooking, bring your own project and stay as long as you like. There’s a $5 fee, and a seat and table space will be all yours!

We also have a Scrapbook Page class on tonight, where we will be creating this lovely page designed by Sharon. We have plenty of places and kits if you would like to join us from 6:30, please ring to book. Kits are available as takeaway if you can’t make it in store.

Scrapbook Page Cherish, Forever and Ever

Have a great day

Tania

Today’s Crafting fun

Out with the markers and aquash brushes today to paint up these cards designed by Sharon. It was challenging as we had to try out different techniques with brushes, markers, crackle medium and pearl paints. Topping this off with the new white distress marker made this something really new for our ladies. It was a little daunting to think we had to “paint” colour onto our flowers, but we were all so very impressed at just how lovely each one turned out.

Card Class Painted Flowers Distress Marker

One lady in class commented during a section that we were all finding tricky,  “This is difficult”.
Another replied ” I guess if we all knew how to do this we wouldn’t be here”.
So wonderful and positive,  I just love all my wonderful customers. Thanks for a great morning.

20150225-212804.jpg

Tania


Class with Michelle

These look so different don’t they? In Michelle’s Art Journal class on Friday 20th February you’ll see that everyone’s work will be unique, all using the same techniques. Different colours, stamps and stencils will make it individual. I’m looking forward to seeing all those finished pages!

Art Journal Distress inks and paints

Term 1 2015 full pages 2

Have a great day!

Tania

Christmas Page Workshop

20150202-115050.jpg

Want to make this great page using Gold Paints and the new Texture Tool? Come along to our Scrapbook Class on either Tuesday morning, Tuesday evening or Thursday Evening and get painty! Classes start Feb 10 2105

20150202-115016.jpg

20150202-115114.jpg
See our timetable (link above on the webpage current timetable) and ring us to book.

Tania

Design Team – Baby album

Last night I came home on such a high after being with 6 talented and lovely ladies. We had a Saturday night designers night and all those who create for The Scrapbook House currently came together. We began with dinner (thanks to China Moon – yum) and then we began working out what we would do to make my idea come to life.

What then happened makes me so proud to be amongst them and honoured to be friends with these creative ladies.

Celeste Glover – Vivienne Crudeli – Sharon Drown

Shelley Epps – Michelle Hearnden – Pamela Haggas

20140615-183740.jpg

I rambled on about what I had in mind, a baby album that could be completed in as little time as possible, using the best products we could get, and looking as fabulous as one would expect from our designers. (they let me ramble too, I’m always scared I’ll forget something so its easier to just not take a breath)

Oh… and I wanted 20 pages or more.

Having spent a long time to think about this, and had clear idea of what would be best for our customers, and who this album would suit. I excitedly waffled on about the details and they all just looked at me for a long time.

Yes, I wanted 20 pages….

or more…

This has been in my mind for years and years. (I’m not going to tell you how long, because that just shows you how I overthink things, procrastinate and don’t follow through with my ideas… and that’d make me look bad –  hehe)

So, I didn’t know how to do it, I just knew that I needed help. The Wedding Album Class I ran a few years back literally took me months to complete and kits. Months.

I had 6 designers , all with varying strengths, talents and styles, who I wanted to work together.  Could they do it? I was sure they could, I was sure they would create exactly what I had in mind. The next hour or so would tell just how well it would work.

20140615-184041.jpg

What you wouldn’t expect was that we would all work together on all the pages at once.  So there was 7 of us, all at once, all pitching in, cutting, sticking, helping on all the pages. All in one go. I’ve never seen this before and what a wonderful experience it was to see everyone working together and for this beautiful album come together so perfectly. Each offering ideas and helping on one another, and supporting each other even when the inks and gesso, stamps and die cut machines were put out of reach. It was hard – challenge accepted and completed!

All 24 pages. Twenty four! These ladies are amazing!

We have a complete album, ready for display and it’s exactly what I dreamed of. This is going to be the most epic baby album class ever seen. One kit, for the whole album, easy for anyone to complete, with the option of doing it in class, or take-away kits.

I can’t wait to share it with you!

TaniaThanks to Celeste, Shelley, Sharon, Michelle, Viv and Sharon for a great night!


Class Kit Prima Divine

Nat’s most recent class kit was jammed with gorgeous products, all chosen by Nat herself from the superb range Prima releases.
Her class is lovely, using bits if everything and there is so much left over, that there are bonus layouts using more of the products all with Nat’s beautiful style.

20130610-103349.jpg

Gee there are a lot of products in this kit – two classes in one!

We have these class kits for sale, each has instructions for the class page as well as photographs of the additional pages and cards completed.  Kits $39.95

Note – because not everyone has the crackle template and texture paste for the first step, I have used my template and done this step for you – I know I got the fun of it, but really didn’t want anyone to miss out on the overall look of this layout, the texture is lovely!

Have a great day!

Tania

Far and Away

Tonight’s class was small, just the four of us, so relaxing and easy that I decided to complete the page along side with the girls. We used Teresa Collins “Far & Away”, I love the banners the most!
Of course because I decided to do this last minute I didn’t have the correct size photos, so I needed to leave the black & white Washi tape and the “sign post” off in order to fit the photos on. So, my layout isn’t as striking as Michelle’s, but at least it’s done. Gotta be happy with that. Our classes are all adaptable to your own style or taste, and to accommodate your photos. There are kits left from this class, call us for yours on 08-99648288

20130613-234525.jpg
An easy night with some fun chatter and some laughs – and a bonus was that I ended up with a few of my “phone” photos of my nephews scrapped! This was our amazing and fun whirlwind weekend away to do the class with Finnabair at Scrapbook Secrets in Perth, which turned into a bit of brotherly love as my two brothers were both in the city too. Loved this weekend – good things.
Night – sleep well xx

20130613-234856.jpg

Family House Printers Tray

20130526-223444.jpg

Friday night fun at The Scrapbook House making a gorgeous house-shaped printers tray, filled with Prima papers and flowers.
We went a little overtime, but then that’s nothing new. Gotta love getting amongst the papers and glue.

20130526-222308.jpgMarion with a few papers here to play with and below Diana making sure it all fits just right.

20130526-222404.jpg Lucky we have plenty of room to spread out.

20130526-222716.jpgPat working away, trying to ignore my banter and bad-singing, can’t wait to see the finished products from everyone.

20130526-222838.jpgVerna, her burned fingers caused her a little trouble tonight, but she kept on – what a trooper!

20130526-223123.jpgRuth added lots of photos to her house, along with flowers and shells from home. A lovely family memento.

20130526-223301.jpgDecisions decisions! Each of our houses started the same, but will all be unique by the time they are ready to hang on the wall.

20130526-223512.jpgI added some things from my Prima stash to the little openings, and some photos too. This will be a gift for my Dad and StepMum – I hope they’ll like it.

20130526-223705.jpgWords cut from the Prima packaging, more flowers and some trinkets. Notice the cool little hammer I added near my Dads picture, I’ve been hanging onto that little beauty for ages, waiting for the perfect project to add it to.

20130526-223842.jpgMore flowers on the roof, the stems were twirled around a thin paintbrush in a spiral, then glued in place. A couple more trinkets and a photo of my babies! Complete! Thank you to Kira for the wonderful class and original design! I have one full kit left in store ($40) and houses on their own coming back into stock soon. They are $10.95 each. Thanks for looking!

20130526-224109.jpg

Dressed to impress

The wire bodice has a new dress, made by the very talented Emily, and it’s gorgeous! Here’s a sneak peek of the front section. Amazing what can be created with the products in our store. Prima paper, lace, ribbon and a few eyelets.

20121016-000900.jpg The dress is part of our decorations for this weekend, and I will be sure to photograph it in better light and post for you to see… It’s longer than the first version, remember what I used to look like, click here to see. It will be in store again on display next Monday.

Meet Celeste

I would like to introduce you to Celeste, who joined our Design Team earlier this year. Please say hi.
Here is a little from her…

Hi my name is Celeste Glover and I have been scrapping for the last seven or so years. Previously I was addicted to cross stitch, sewing and photography, until I went to a class one night and got hooked on scrapbooking. I live with my husband Alan and four great kids, Chloe 17, Alexander 14, and my twins Cameron and Amberly 12. I find inspiration from absolutely everything and can’t wait to share it all with you.

Celeste worked with the Bo Bunny Enchanted Range last Term and designed these for us. Her first class was well received, and many ladies scrapped beautiful memories of their Wedding Day or School Ball. So many compliments came back from the ladies who did this and the whole paper range sold out on the day of class.


Celeste’s blog is called Gero Girl and you can find it here… and here is the address http://www.gerogirl.blogspot.com.au/

20120428-193827.jpg

We have been lucky enough to have this project on our front counter for the past few weeks, made with the Graphic 45 TropicaI Travelogue collection, is is full of goodness! I love these colours, the blue is so bright and fun! Of course this is available at The Scrapbook House.
If you missed seeing it on our counter in real life, you can see every page here on Celeste’s blog where she had photographed every page. Did you know this mini album was made from paper bags?

Have a fantastic day!
Tania xxx

Take a Seat or Take a Kit

We have leftover kits available for Term 2, so if you’d like a place in our class, now is the time to say so. If you can’t come to class that’s ok, each kit has full instruction and a photograph, plus photographs of more layouts to make with your leftover once the class is done. There are Five classes in the term and the term costs $150. Each class is a different style by a different designer to give a well-rounded scrapbooking experience over the next ten week.

Class One comes with one Black Distress Ink to get you started.

The background is embossed with white and the Crafter Template – Bingo, which we will do in class, but those who purchase as a remote student will have this part of the class pre-done in case you don’t have all the tools needed for this step.

20120429-013003.jpg

Here is a pic of our first class. Our kits are fun and full and our designers have created extra pages using your leftovers. These photos are included in your instructions each fortnight. You just need to add your background card to suit your photos, in this case it’s a couple of smokey colored Bazzils and another white.

Call us today and sign up! 08 99648288

Fly free

Want a sweet little project to put together? Try one of the chipboard birdcages, like this one by Kira. She has chosen a whimsical blue to paint her Twiddleybitz project and added some gorgeous Prima flowers and pearls.

20120411-205418.jpg

The roof has one of the sweet papers also by Prima. I love how carefully Kira has painted this, leaving the insides of the railings in the natural chip colour, it gives it better depth, and hidden inside is the sweetest little nest with robin eggs. I have a few sets of these, and was keen to out them on a page, but seeing them in this cage, it’s like they were made for it!
Now if I can just find a bird…

20120411-210350.jpg

Paper dress

The new Bo Bunny Double Dot paper line has been displayed in a different way in our store today as Emily’s paper dress idea was completed on the gorgeous wire bodice given to me as a Christmas gift by Sharon. Thanks Sharon!
She chose the Tim Holtz rosette die to cut the various colours into rosettes to decorate and the new Cricut machine cut the swirls (they are from the new cartridge that is pre-installed in the newest version of Cricut)
Gorgeous huh?

20120410-233647.jpg

And here is a closer image. There is also another sheet of paper where we have cut the words out, we love the quote from the book “The Help” You is kind. You is Smart. You is Important.

It seemed only perfect to add this and the other words and banners cut from the paper too…. now I can’t think of the name of that paper now, but it’ll come to me.We have also used the Martha Stewart Border punch and the butterfly punch. Cute huh? We have used plenty of hot glue and the paper ribbon bow is one that Emily drew for her last kids class. It’s very simple, and she has a template at the store, just ask when you are in next if you’d like to trace it off to make your own.

20120410-234006.jpg

Thanks for looking, I hope you like!

New things, pretty things

Nothing like new things to inspire you and the new ranges have been inspiring Natalie aplenty!

Here is a page she worked on today using the new Sunkiss Range. I love the layers, even the bottom layer has texture past that has been embossed and glimmered. Nat has used the new papers, journal cards (cleverly used as frames for her gorgeous photos), alphabet stickers, as well as the famous Prima flowers.

The Prima “SONGBIRD” collection of papers is soft and pretty. Here she has used delicious Prima flowers, Twiddlychip, tea-dyed muslin and Prima embellishments, that little bird on a branch is cut from one of the papers. I can also see a few Collections butterflies hidden in there too. Always fun looking at Natalies’ work, the more you look, the more you see.

Scrapping

It’s not all fun and games and dressing up you know! We actually do get some scrapping done.

Here are some layouts my friends and I completed over our weekend away. Enjoy!

by Alison. Play – Al loves Kraft!


by Alison – A Wild Ride.

by Alison – Wild Boy

by Nat – Friends

By Basilia – The Travelling Red Dress

Basic Grey POTM February kit, Tania – Horseriding

by Tania – My Crafty Boy

Basic Grey POTM kit 2011, Tania – Michael Buble

Nats class kit, Tania – A little fruity

by Basilia – Little Man

Nat’s class kit, Michele – Mates

by Michele (apologies for losing your ‘f’) Father and Son

By Nat – Happy Feet

by Alison – The Groundsman

Copy of a Geraldine Pasinati layout, by Basila – Dream Big

Copy of a Geraldine Pasinati layout, by Nat – Your Beauty Radiates

Copy of a Geraldine Pasinati layout, by Tania – The Little Things

Copy of a Geraldine Pasinati layout, by Michele – My Precious Girl

Making new look old

Seems that is such a popular look for scrapbooking, that almost everything scrapping I touch I feel the need to distress and ink. Every flower, every edge.. my poor old daubers get a work-out. Edges are roughed, photos are sanded, I even got the store an electric distresser for the last class of the term there was so much distressing in it. Love that look.

Term 4 2011 Sneak Peek Scrapbook House Geraldton Class

This terms classes is no exeption and I took it one further and did the photo as well. But I realise this isn’t something that can be easily done at home as I used a photoshop program to do it. Seeing as I haven’t found the time to teach photoshop lessons again, I thought I would offer to do this for you.

This is the orginal colours… a little playing in Photoshop and this is the result.

So… if you are taking our Term 4 classes, and have a photo in mind that you would like to use for the “Handsome” page, and you would like it looking like this aged photo… then bring it in on a USB and I will alter it for you.

Have a great day!